Managing Assets
Prerequisites and Related Articles
The configuration/management of assets is done via the XMS. The rest of the article will assume that you have admin access to an XMS installation. If you do not have an XMS installation already set up, Xertified can provide one for you, or you can install one yourself by consulting the XMS installation manual.
Assets
An asset refers to any device or subnet that the XoT Management System (XMS) has knowledge of. Assets are divided into two groups unproteced and protected, which is determined by whether access to the subnet or device is managed by an XoT. Protected in this case simply means that the asset is protected by XoT Technology.
If an asset is created in the XMS it will be considered unproteced until it is assigned to an XoT (naturally it also has to be physically connected on the protected side of the XoT-Lock). Once this is done it is considered a protected asset.
When logged in to the XMS with an admin user you will be able to administer devices by navigating the Assets section of the main menu:
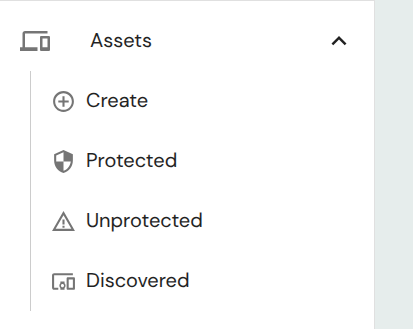
From here you can list protected, unprotected and discovered assets, as well as create new ones.
Asset Attributes
Asset attributes are labels you create to categorize your devices and subnets. They are the primary mechanism that access policies use to target assets. Instead of creating policies that specifically target individual devices or subnets, you can create broader, more scalable policies that apply to any asset with a matching set of attributes.
For more information about how policies use these attributes, see the Policies and Access Control article.
A new XMS installation does not come with any attributes pre-configured as these will vary greatly between organizations. Before attributes can be assigned to an asset, they must first be created in the XMS system settings.
There are two kinds of asset attributes:
Asset Classification
These attributes define a broad high-level category of an asset (its Type) and what smaller sub-category it belongs to (its Group).
To create and manage these types and groups, navigate to System Settings → Asset types & groups in the main menu.
Asset Location
Locations allow you to model the physical placement of your assets. Locations are hierarchical, allowing you to represent structures like countries, cities, street address, or room.
To create and manage locations, navigate to System Settings → Asset locations in the main menu.
Discovered Assets
Discovered assets are devices that have not been added to XMS yet, but that have been detected by an XoT. This detection is done when the XoT sees DHCP requests coming from devices on its protected side. Discovered assets will then be listed on the Discovered page in XMS. A device asset can then be created by clicking on the Create button of a discovered asset on the Discovered Assets page. Doing this will open the asset creation page in the advanced view, with values for Type, Connected to and MAC-address automatically filled in. Creating an asset through this way is equivalent to doing it yourself manually filling out the same values for Connected to and MAC Address.
Creating Assets
You can start creating an asset from the Create menu item, from the Discovered Assets page, or inline from an XoT's details page. The Create menu item opens a step-by-step Asset Wizard that adapts to the kind of asset you are creating. If you would rather see and fill in every field on a single page, click Switch to advanced view in the top-right corner of the wizard.
The Asset Wizard
The wizard collects the asset's identity and attributes first, then branches based on the kind of asset you choose:
- Name — the asset's name and an optional description.
- Classification — its Type and Group (see Asset Classification above).
- Location — Country, City, Street address, and Room number (see Asset Location above).
- Asset Type — pick one of:
- Single Device (Same Subnet) — a device on a subnet that is directly connected to an XoT-Lock.
- Single Device (Different Subnet) — a device on a subnet that is itself an asset behind an XoT.
- Subnet — an entire subnet protected by an XoT.
- Remote Subnet — a subnet reachable via a gateway that lives on the protected side of an XoT.
The remaining steps depend on the chosen Asset Type. The final step is Review; clicking Finish creates the asset.
A panel on the right summarises the answers you have given so far and shows a topology diagram for the chosen Asset Type.
The Advanced View
The advanced view is the same form used to edit an existing asset, just with empty values.
The Info Tab
Info
The Info section contains the most basic information about the asset.
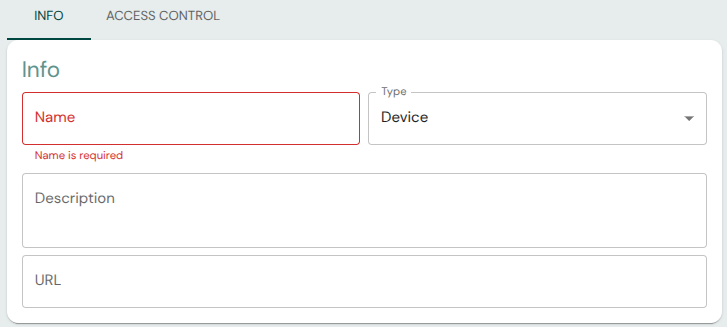
- Name: This field sets the name of the asset. Natuarally this is the most important field for users to correctly identify the device or subnet.
- Description: If a more detailed description is warrented to explain what the asset is, it can be filled in here.
- URL: The url field is a way of specifying a clickable URL for accessing the asset in question which will appear in clients that have access to the asset.
- Type: The type field determines whether the asset in question is a single device (with a single IP), if it is a subnet that is directly accessible from the inside of the XoT, or if it is a remote asset which is reachable via a gateway.
Connection
The connection section specifies what the asset is connected to (i.e. can be accessed from). This can either be an XoT directly, or if the asset is a device, it can be connected to a subnet. In this case the device will denote one device on that subnet.
The reason for creating assets for individual devices on subnets is to allow more granular access control to only parts of a given subnet, instead of giving blanket access to an entire subnet.

Device Network Settings
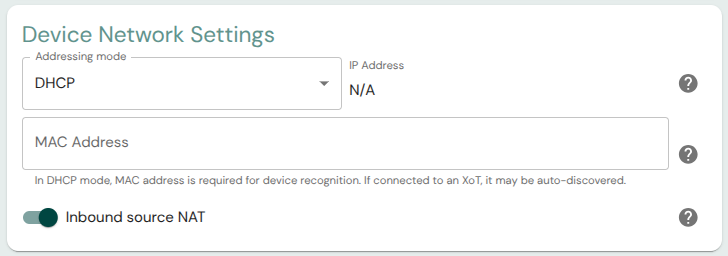
If you are configuring a device, you will find various various network related settings in the Device Network Settings section. For devices using DHCP, a MAC-address can be used to identify them.
Changing the Addressing mode to Static assignment allows specifying which IP the asset has.
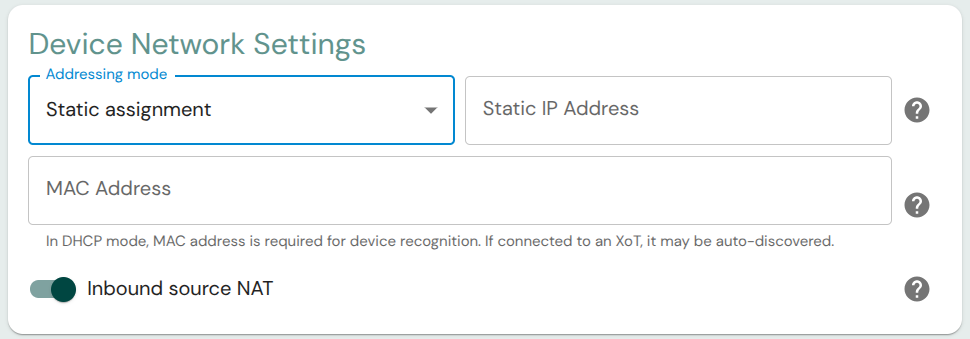
The Inbound source NAT setting controls whether the XoT protecting the asset should perform source NAT on incoming traffic, thus making the source of network traffic to the asset look like it is coming from the XoT instead of the original source IP.
Subnet Settings
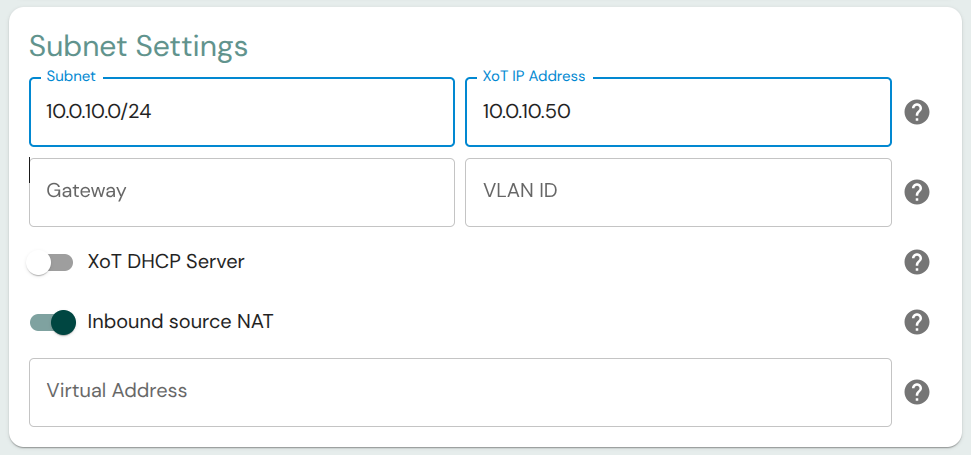
If you are configuring a subnet (by having Type set to Subnet) you will instead be shown a Subnet Settings section.

In the Subnet Settings you can specify the IP of the subnet in CIDR notation and the IP the internal interface of the XoT should have on this subnet.
If traffic to the subnet needs to be routed you can set a value in the Gateway field. Having a VLAN tagged network is also supported and you can set the VLAN ID to enable this functionality.
If you want a subnet to expose a virtual ping target for installation checks or troubleshooting, open the connected XoT and enable Dummy Asset under Advanced -> Diagnostic Settings. The XoT will then answer on the last usable address in that subnet, for example 192.168.1.254 in a /24 network.
Remote Asset Settings
A Remote Asset is either a device or a subnet that is reachable on the inside of an XoT, but not directly connected to the XoT’s protected interface. Traffic to the remote asset must be routed via a gateway that lives on the subnet on the protected side of the XoT.

If you are configuring a remote asset (by having Type set to Remote Asset) you will instead be shown a Remote Asset Settings section.
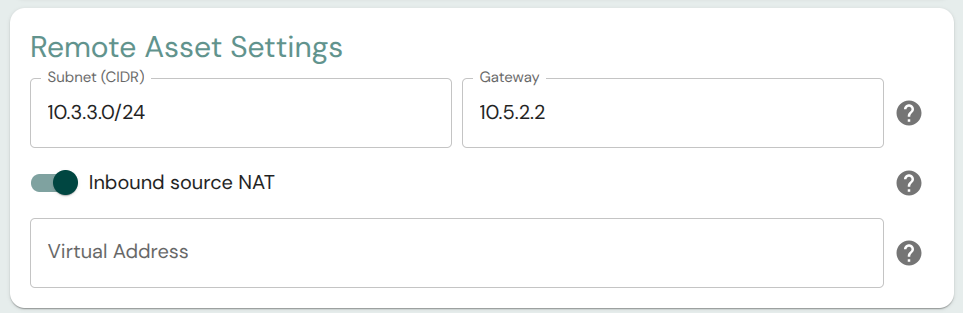
Specify the CIDR of the asset in question (/32 for a single device) and the Gateway through which the asset can be reached. Remember to also connect the remote asset to the subnet that contains the gateway IP. If that subnet does not exist then you must create it before you can connect the remote asset to the subnet through which it can be reached.
Policies can target remote subnets using the same attribute model (Type/Group/Location) you use for other assets.
Inventory
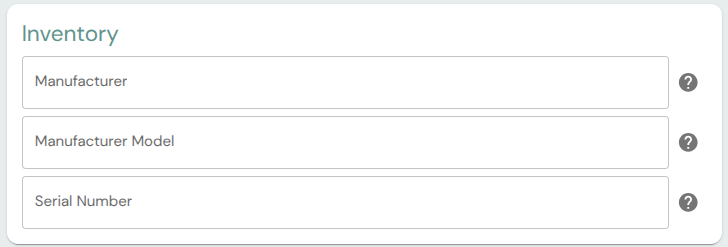
There is also an inventory section that allows specifying more identifying information. These fields to do not have any functionality associated with them, they are simply to help identifying and managing assets.
The Access Control Tab
In the access control tab Asset Attributes can be set. This is where you assign the predefined types, groups, and locations to the asset.
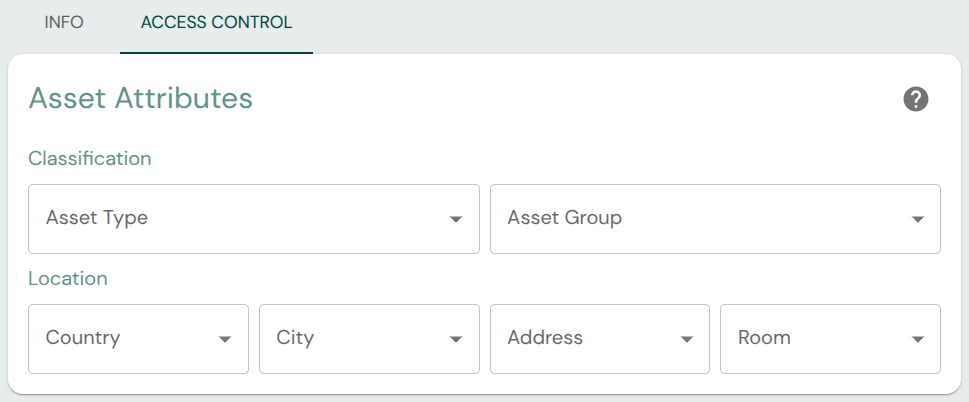
The asset type, group and location settings defined here are used by access policies to determine what assets they give access to.
Creating a Policy from an Asset
Once an asset has been saved, the Access Control tab also provides a shortcut for creating a policy that targets it. Click Use in new policy and choose one of:
- As destination — Opens the policy creation page with the asset's classification and location pre-filled as the policy Destination.
- As source — Opens the policy creation page with the asset's classification and location pre-filled as the policy Source, as a Protected Asset (machine-to-machine) source.
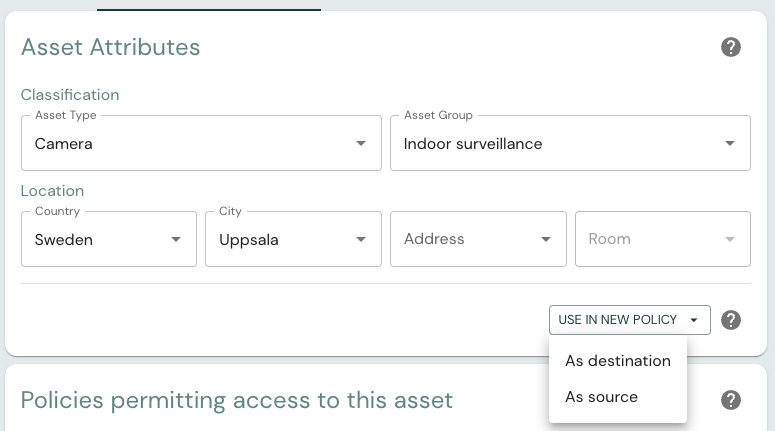
The new policy is pre-populated only with the asset's attributes; you still fill in the remaining Who, How, and When details and save it like any other policy. The button is disabled while the asset has unsaved changes — save the asset first.