XoT-Desktop client configuration
Overview
The XoT-Desktop Client requires a few key components to be configured before it can run properly. These components can be installed automatically through enterprise deployment tools or set up manually by the user.
The XoT Client configuration consists of three main parts:
User certificates and settings
Each user needs a personal certificate (and private key) for authentication. These credentials may be file-based or use a hardware token (like a YubiKey). Optionally, user-specific settings can also be applied. Stored in the user’s local configuration directory.
Global configuration
System-wide settings that apply to all users on the machine. Typically includes connection details and default client behavior. Stored in a shared system directory.
Root certificate
The trusted root CA certificate used to communicate securely with XoT components. Installed into the system certificate store or keychain.
Deployment scenarios
Depending on how your organization deploys the XoT Client, you may or may not need to configure it manually. There are three common scenarios:
Fully automated deployment
- Global configuration and root certificate are bundled with the installer (via Microsoft Intune, or similar).
- User certificates are pushed automatically to each user.
- No manual action is required by the end user.
Partially automated deployment
- Global configuration and root certificate are bundled with the installer.
- User certificates are not deployed automatically.
- Users must run the configuration tool to install their personal certificate and settings only.
Manual deployment
- Nothing is pre-installed.
- Users must run the configuration tool to install all three components:
- Root certificate (requires admin rights)
- Global configuration (requires admin rights)
- User certificate and settings
Manual configuration
If you fall into scenario 2 or 3, you’ll need to use the configuration tool for your platform.
Windows
XoT Client Config tool
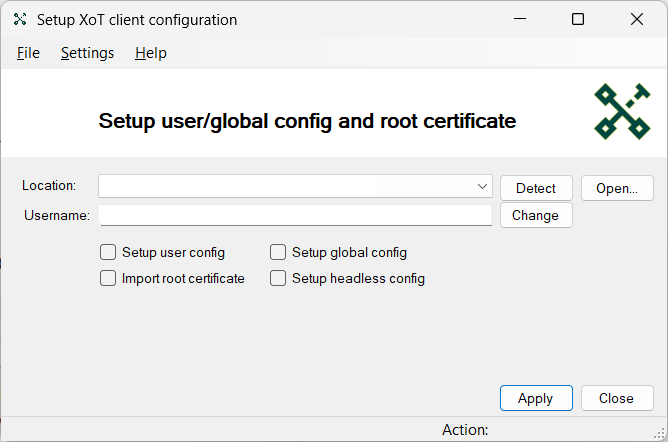
On Windows, configuration is managed through the XoT Client Config Tool, a graphical utility.\ Simply search for XoT Client Config and run it. It also opens automatically if the client detects missing configuration.
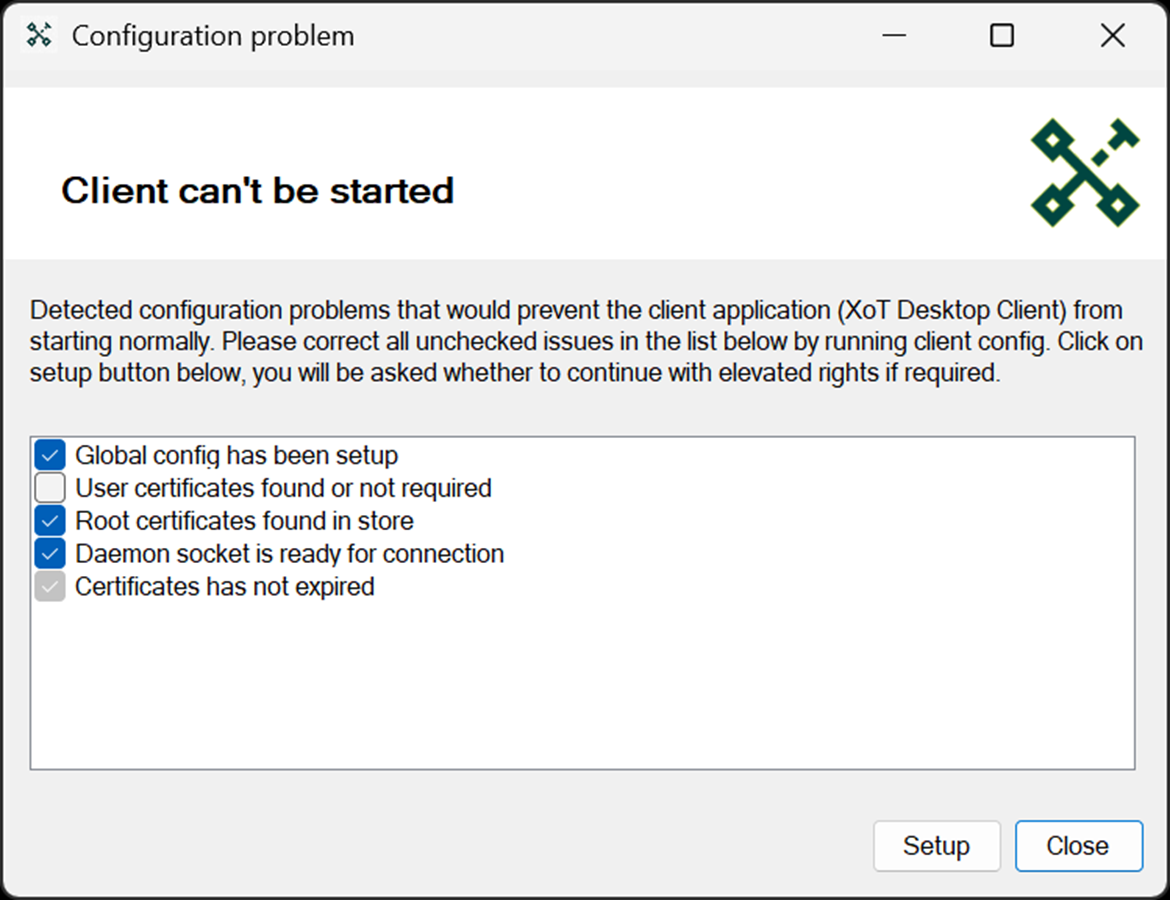
It the XoT-Desktop Client is started without having all proper configuration another Window is shown to help the user preform the necessary setup:
Configuration options
| Option | Description |
|---|---|
| Location | Choose the configuration .zip file. Options: auto-detect in Downloads, browse manually, or specify a path/URL. |
| Username | Select which user to apply the configuration to. |
| Setup user config | Installs user-specific files (xot_settings.json, user_cert.pem, user_key.pem) into %LOCALAPPDATA%\Xertified. |
| Setup global config | Installs system-wide configuration (admin rights required) into %PROGRAMDATA%\Xertified\Config. |
| Import root certificate | Adds the root CA certificate to the Windows certificate store (Current User or Local Machine). |
| Setup headless | Configures the client to run as a background service without UI. |
Applying Configuration
-
Scenario 2 (partially automated deployment):
-
Select your configuration
.zip. - Check Setup user config only.
-
Click Apply.
-
Scenario 3 (manual deployment):
-
Select your configuration
.zip. - Check Setup user config, Setup global config, and Import root certificate.
- Click Apply (admin rights required).
macOS and Linux
On macOS and Linux, configuration is handled with the config-setup script:
/opt/xertified/bin/config-setup.sh
Usage examples
# Doing only setup of user credentials
config-setup.sh --file config.zip --user

# Doing full setup (requires root)
sudo config-setup.sh --file config.zip --user --global --cert
(See full option list below for advanced usage.)
Options
| Option | Description |
|---|---|
--file |
Specify configuration archive file |
--cert |
Install root CA certificate |
--global |
Install global configuration |
--user |
Install user configuration |
--headless |
Setup for headless client mode |
--detect |
Auto-detect configuration files |
--all |
Install all configuration types |
--backup |
Backup existing configuration |
--overwrite |
Overwrite files without prompting |
Acquiring the configuration
Configuration files containing both root certificate, global settings and user specific credentials can be exported by the XMS. For a normal user they can only export their only configuration while an admin may export configuration for any user.
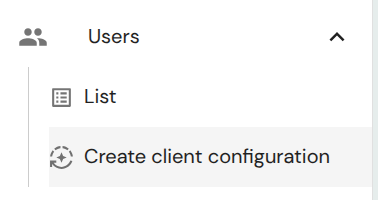
Do do this log in to your XMS installation and navigate to the Generate client configuration in the Users section of the main menu.
From here you can fill out the relevant common name for the certificate and whether it should be able to be used with file-based and/or a hardware token. If you are logged in as an administrator, then you can generate many configurations at once.
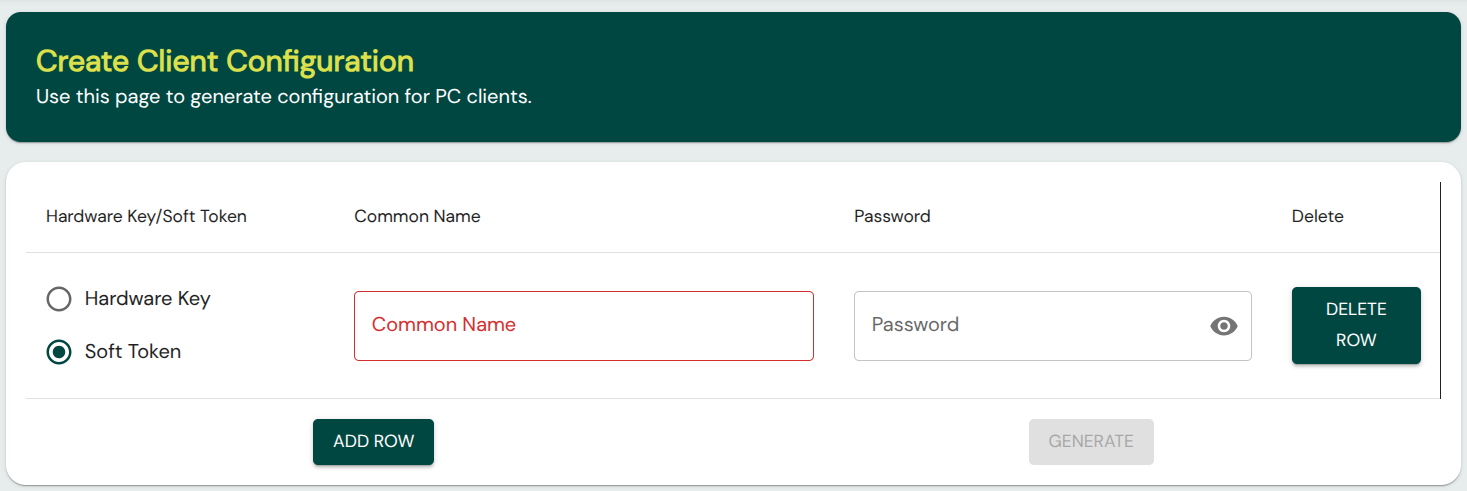
When you are done filling out the settings simply press the Generate button and an archive will be generated and then downloaded by your browser.
Smart card and Yubikey configurations
This section explains how to issue and configure smart cards and Yubico Yubikey for use with the XoT Client.
When using smart cards (hardware tokens such as YubiKey or Gemalto IDPrime), the user certificate and private key are stored on the card instead of in local files. The rest of the configuration (global settings and root certificate) is handled in the same way as described in the Client Configuration section.
Prepare a Configuration Archive with Hardware Token Support
-
In the XMS, go to Users → Create Client Configuration.
-
Create a configuration with the following settings:
-
Hardware key selected.
- Common name set to the user’s email (must match the CN).
- A password must be set.
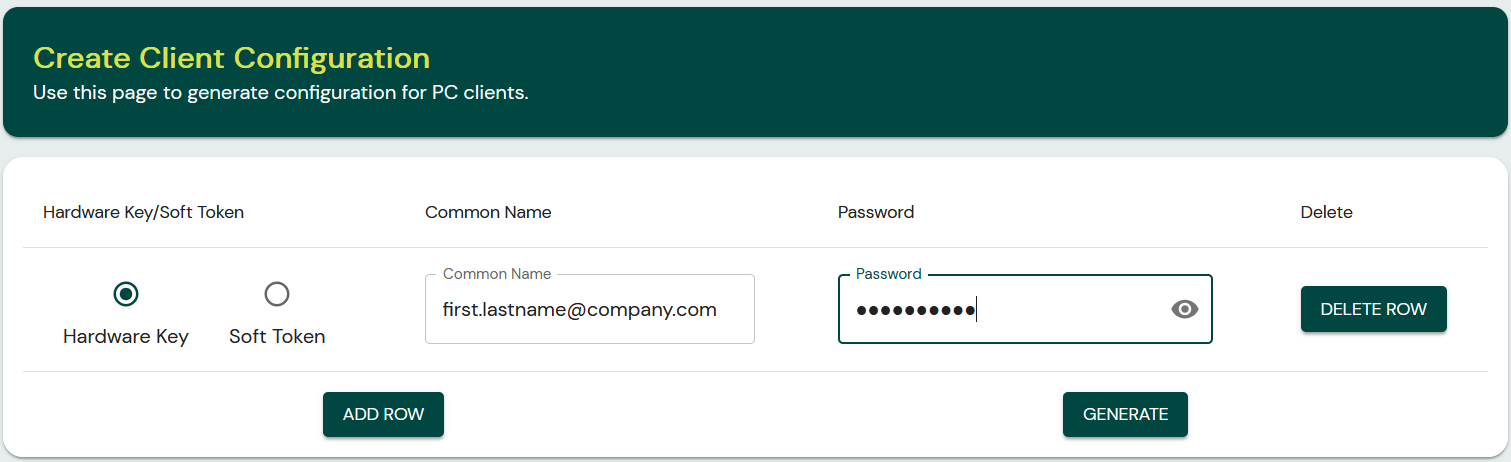
-
Press GENERATE to download the configuration archive (
config.zip). -
Unzip the downloaded archive.
-
Inside, unzip the
user_config_first.lastname@company.com.zipfile using the password you set.
This will give you the user certificate (user_cert.pem) and private key (user_key.pem) that need to be written to the smart card.
For smart card issuers on macOS or Linux
Prerequisites
- OpenSSL (source)
- p11tool (OpenSC/libp11)
- Net iD Client version 1.1.3.37+ by PointSharp
- A supported smart card (e.g. Gemalto IDPrime .NET)
- A smart card reader
- A Bash terminal
- OpenSC (Open smart card) Optional for alternative verification.
Push certificate files to the smart card
- List available smart card tokens:
p11tool --provider=/usr/lib/netid/libnetid.so --list-token-urls
- Export the token URL to a variable (example shown):
export pkcs11url="pkcs11:model=IDPrime%20.NET;manufacturer=Gemalto;serial=283EE00B11XXXXXX;token=IDPrime%20.NET%20%28basic%29"
- Upload the private key and certificate to the smart card:
   p11tool --provider=/usr/lib/netid/libnetid.so \
           --load-privkey user_key.pem --write --login \
           --label xotuser $pkcs11url

   p11tool --provider=/usr/lib/netid/libnetid.so \
           --load-certificate user_cert.pem --write --login \
           --label xotuser $pkcs11url
At this point, the user’s credentials are stored securely on the smart card.
Verify a smart card issued with certificates
Prerequisites
- The XoT-Desktop Client.
- Either Net iD Client or OpenSC.
Verification steps
- Run the
config-setup.sh --global --certscript. - Verify that the global config contains the correct token setting:
{ "client": { "token": "<setting>" } }
The <setting> must match the installed dependency (NetId or opensc).
- Apply the configuration. Restart the daemon service and client if prompted.
- Insert the smart card and open the XoT-Desktop Client.
- The token should appear as an available credential.
- Select it to authenticate.
If authentication succeeds, the smart card is correctly issued and configured.
For Yubikey issuers
Prerequisites
- The Yubico Authenticator tool.
- The XoT-Desktop Client.
- Either Net iD Client or OpenSC (Open smart card).
Push certificate files to the Yubikey
- Insert the Yubikey and make sure the Yubico Authenticator recognize the token.
- Under "Certificates", set or reset the PIN.
- Select slot "9a Authentication" and click "Import file". Select the "user_key.pem", click "Open", and then "Import". If asked to overwrite the slot, click "overwrite" only if you know that the private key you are overwriting is obsolete or stored in a backup.
Verification Steps
- Start the XoT Client Config Tool (Windows), or run the
config-setup.shscript (macOS/Linux). - Apply the global configuration and root certificate if they are not already deployed automatically.
- On Windows: check Setup global config and Import root certificate (admin rights required).
- On macOS/Linux: run with
--global --cert. - Verify that the global config contains the correct token setting:
{ "client": { "token": "<setting>" } }
The <setting> must match an installed prerequisite software dependency (yubico, netid, or opensc).
- Apply the configuration. Restart the daemon service and client if prompted.
- Insert the Yubikey and open the XoT-Desktop Client.
- The token should appear as an available credential.
- If not auto-selected, then select from the token-list to authenticate.
- Insert the PIN.
If authentication succeeds, the Yubikey has been correctly issued and configured.