Add users to XoT Technology
1. Add users when connected to EntraID
1.1 Add user(s)
- Go to the Microsoft Azure Portal to manage users
- Click "New user"
- Select "Create new user" if it's a new employee of your company.
- Select "Invite external user" if it's an invitation to an external user.
- The new user is required to have at least an email, first, and last name.
1.2 Add group(s)
- To Microsoft Azure Portal to manage groups
- Click "New group"
- Group type: "Security"
- Membership type: Assigned
- The new group is required to have at least a group name.
1.3 Add user(s) as member(s) of group(s)
- Add members to the groups by selecting the group and adding users, or by adding membership to groups for a selected user.
1.4 Directory Sync
- Go to the XMS
- See the Users list.
- If the users and groups have not yet been added, press the "Sync" button on the table bar and wait two minutes. If the browser window does not refresh, press F5, and the users and groups will be shown in the list.
2. Add a user when using Keycloak
- Log in to Keycloak
- Select the XMS realm
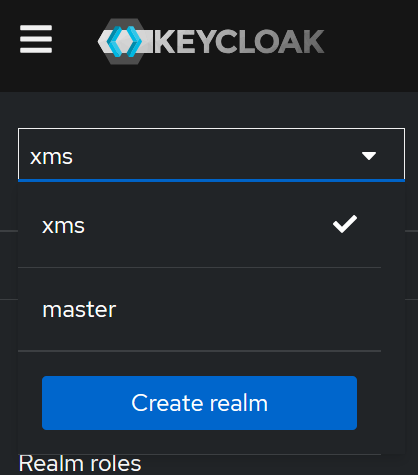
2.1 Add user(s)
- Go to "Manage"->"Users".
- Click the "Add user" button.
- Toggle the "Email verified" to "on". (Keycloak need an SMTP (email) server if users are to verify their emails).
- Add a Username (mandatory). Do not use non-American letters or special characters.
- Add Email (mandatory).
- Add First name and Last name (optional).
- Click the "Join Groups" button and select the groups the user should be a member of.
- Click the "Create" button.
- To set a password, go to the "Credentials" tab of the user. Then click "Set password".
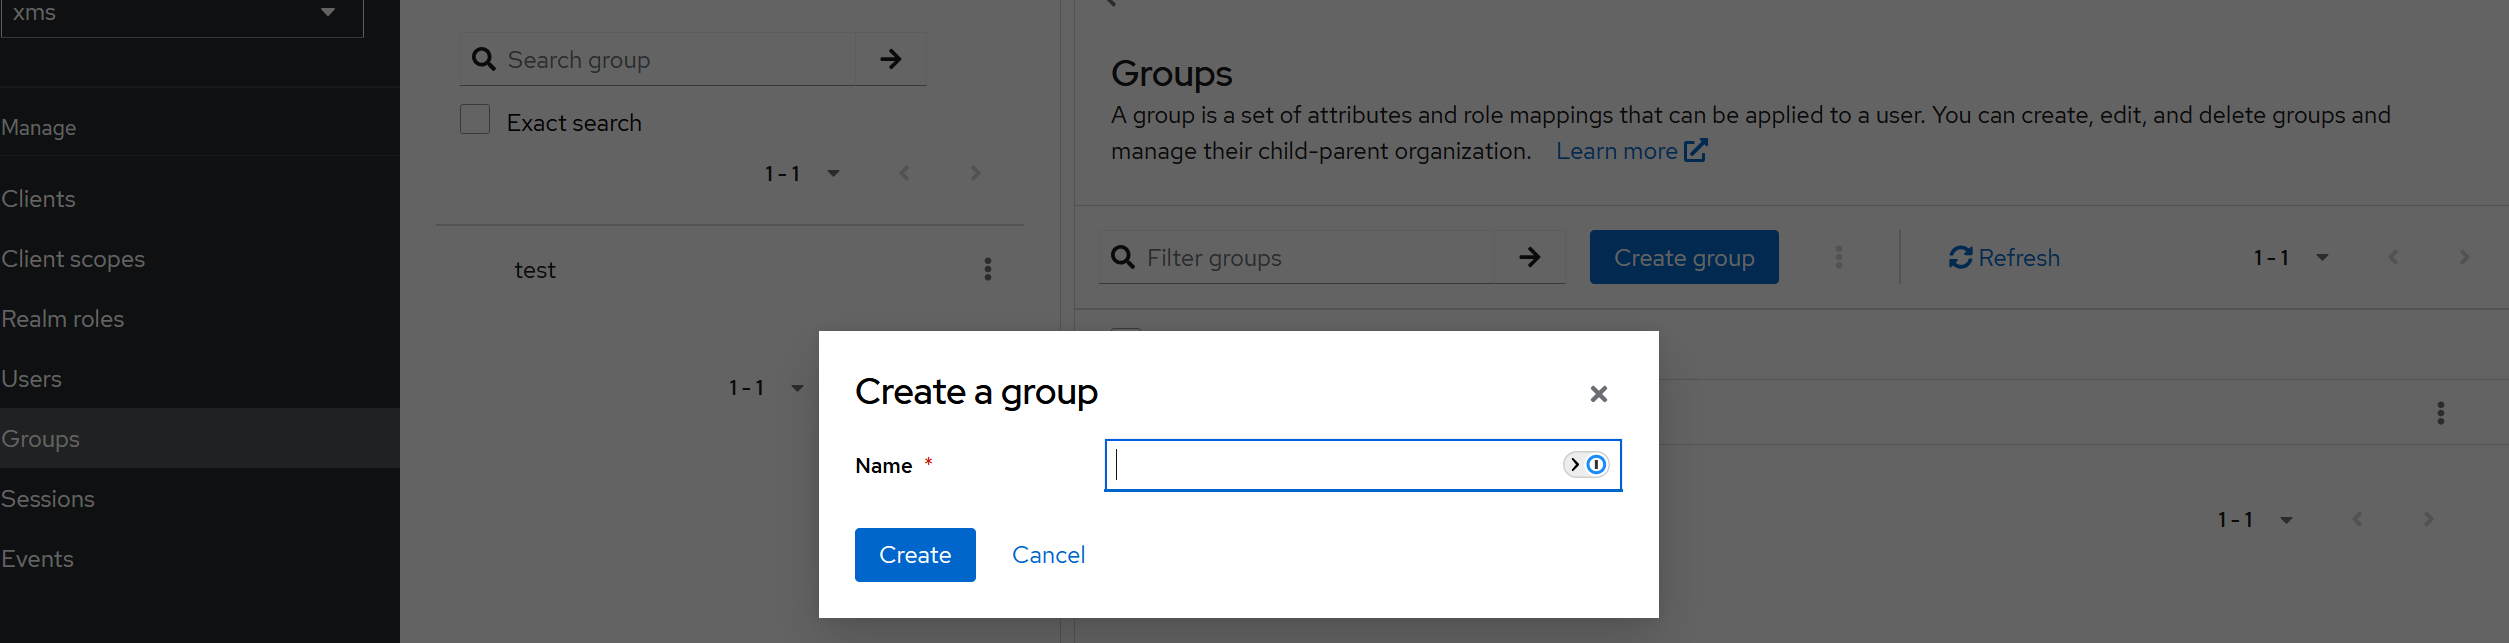
2.2 Add group(s)
- Go to "Manage"->"Groups".
- Click the "Add Group" button.
- Add a group name (mandatory) and click "Create".
3 Set XMS Access rights and Cert CN for the user(s)
Go to the XMS -> "Users" -> "List". Click the user, set the XMS Access level, and configure the "Cert CN" name.
3.1 XMS Access levels are:
| Role | XMS Access | XoT Access |
|---|---|---|
| None | No | No |
| User | No | Yes |
| Admin | Limited | Yes |
| Root | Full | Yes |
3.2 Configure Cert-CN
The certificate common name (CN) shall always be the same as email or connections will not be allowed. E.g. Cert CN: "tester@test.com", E-mail: "tester@test.com".
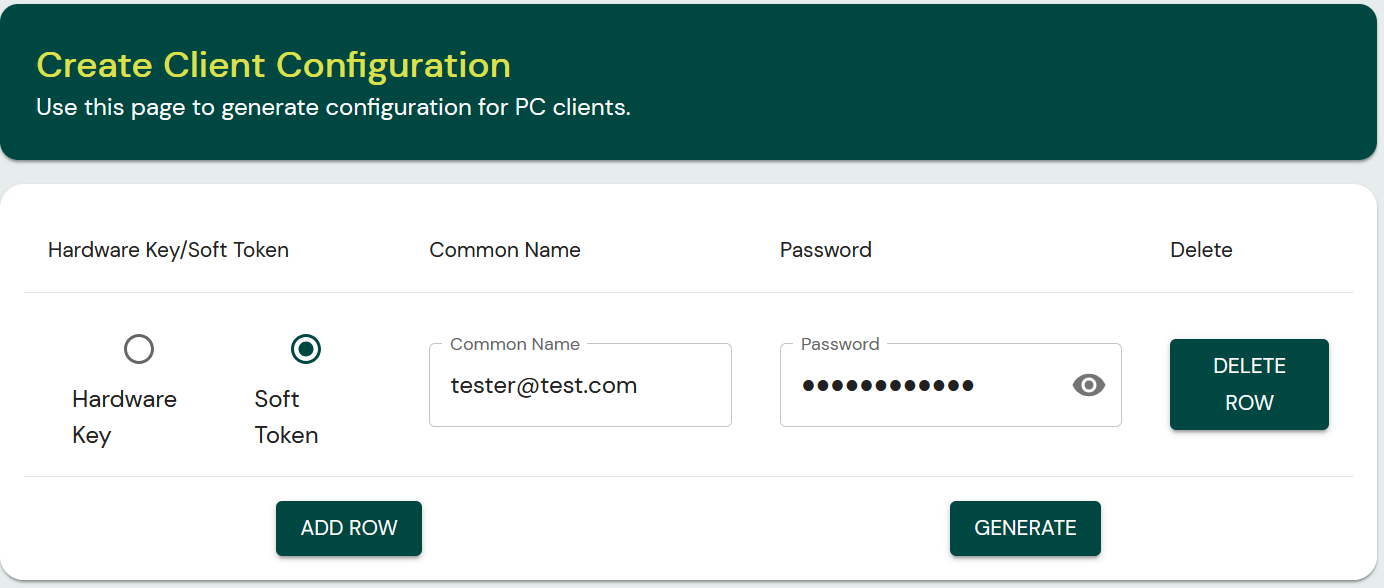 Create Client Configuration for the tester@test.com user.
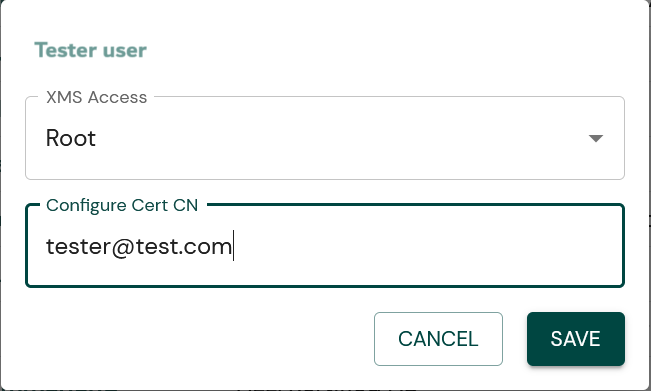 "Configure Cert CN", the user's "E-mail" and client config "Common Name" must be the same (E.g., tester@test.com).
4 Create Client Config(s)
- Go to Create Client Configuration in the XMS.
- Choose if the user is to use a hard-token (smart card, YubiKey, etc.) or a soft-token (certificate file).
- Set the Common Name to the user's email.
- Set a password with the user needs to configure the XoT-Desktop client.
5 Distribute Client Config(s)
The Client Config(s) should be distributed to the user(s) as securely as possible. Depending on your organization's infrastructure, you may use systems such as:
- Microsoft Active Directory Domain Services Group Policies.
- Microsoft Azure Storage Account and user Entra ID authentication.
The security of the XoT Network depends on the security and privacy of the distribution of these configurations. Please consult your partner or Xertified if you have any questions.
5.1 Distribution via Azure storage account
- Go to the Microsoft Azure Portal to Storage Accounts.
- If there is no storage account, create a new one.
- Upload the Client Config(s).
- Generate SAS link(s) to the Client Config(s) and distribute them to your users.
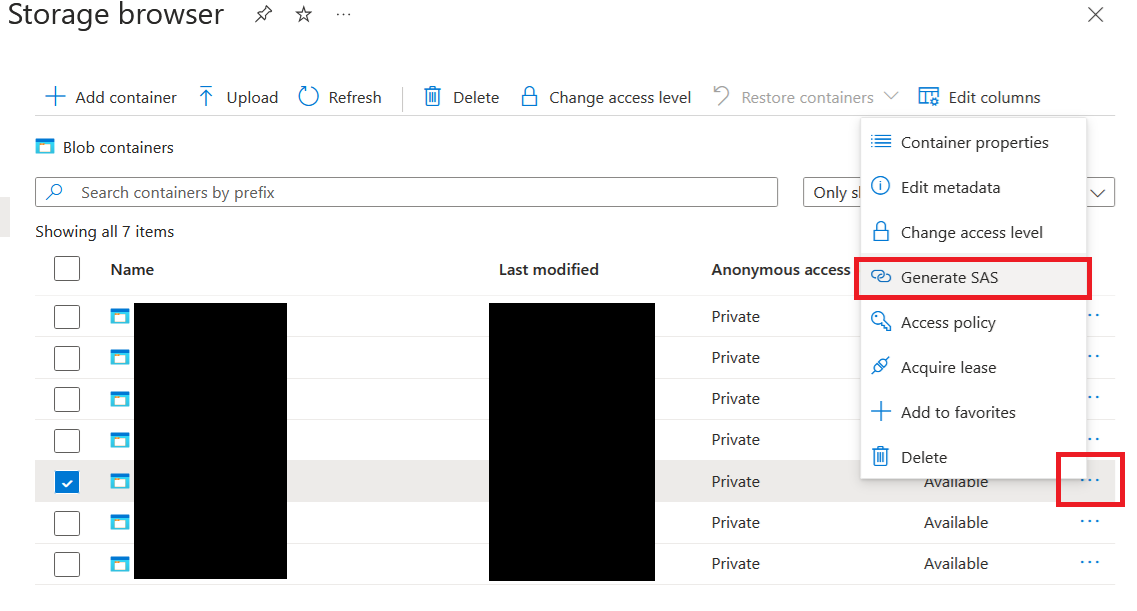
- Send the Client Config(s) password(s) to new the user(s).
- Using the XoT-Desktop client, the XoT Client Config, and the password, they will be able to start the XoT-Desktop client and connect to the XoT network.