XoT-Lock Configuration
Prerequisites and Related Articles
For a more general description of how the XoT-Lock works you can read the component article here.
To configure your XoT, you must have an enrolled XoT-Lock on an XMS you have administrator access. You can find the enrollment manual here.
If you do not have an XMS installation, Xertified can provide one for you, or you can install one yourself: consult the XMS installation manual.
Info
The device objects contain both the configuration of the XoT-Lock and that of the device or devices protected by the XoT-Lock. In the next major these will be configured separately. Currently, they are both configured through the same 'device' object.
By selecting Devices in the main menu and clicking on the device you want to configure, you will be taken to the info tab of the device configuration.
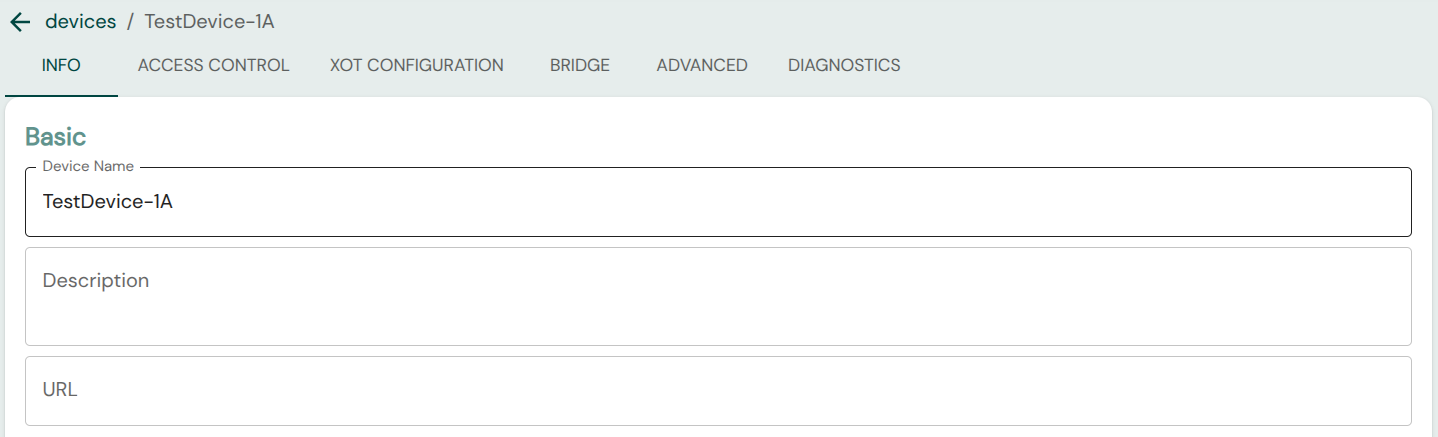
From here, you can enter the basic details, most importantly, the Device Name. The fields here do not impact functionality but are crucial for keeping track of the XoT-Lock and protected device(s).
In the tabs at the top, you can see the other configuration pages: ACCESS CONTROL, XOT CONFIGURATION, BRIDGE, ADVANCED, and DIAGNOSTICS.
Access Control
From the ACCESS CONTROL tab you can see the device classification and location settings that determine what policies apply to this device.
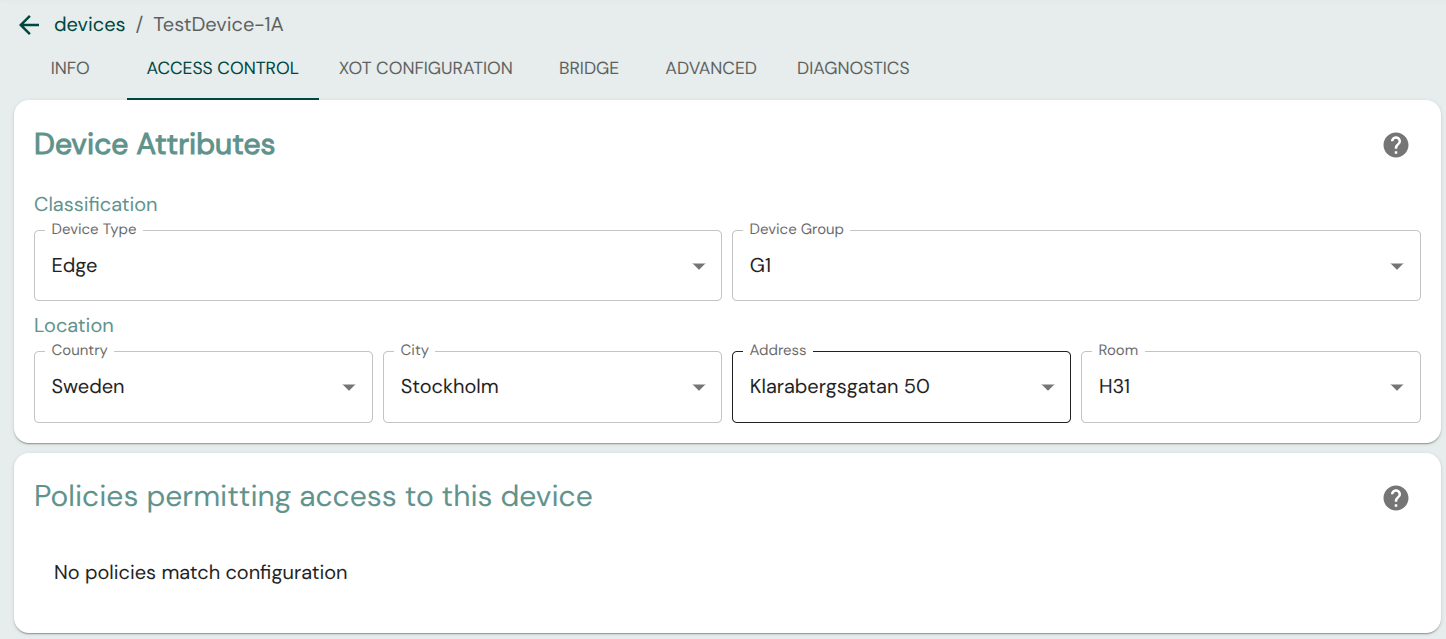
Two hierarchical groups of attributes describe the device as it relates to access control:
Device classification
- Device Type
- Device Group
Device location
- Country
- City
- Address
- Room
In order to be able to create narrowly targeted policies it is necessary that devices themselves have these attributes sufficiently filled out to allow this.
After creating a matching policy (see the policy manual):
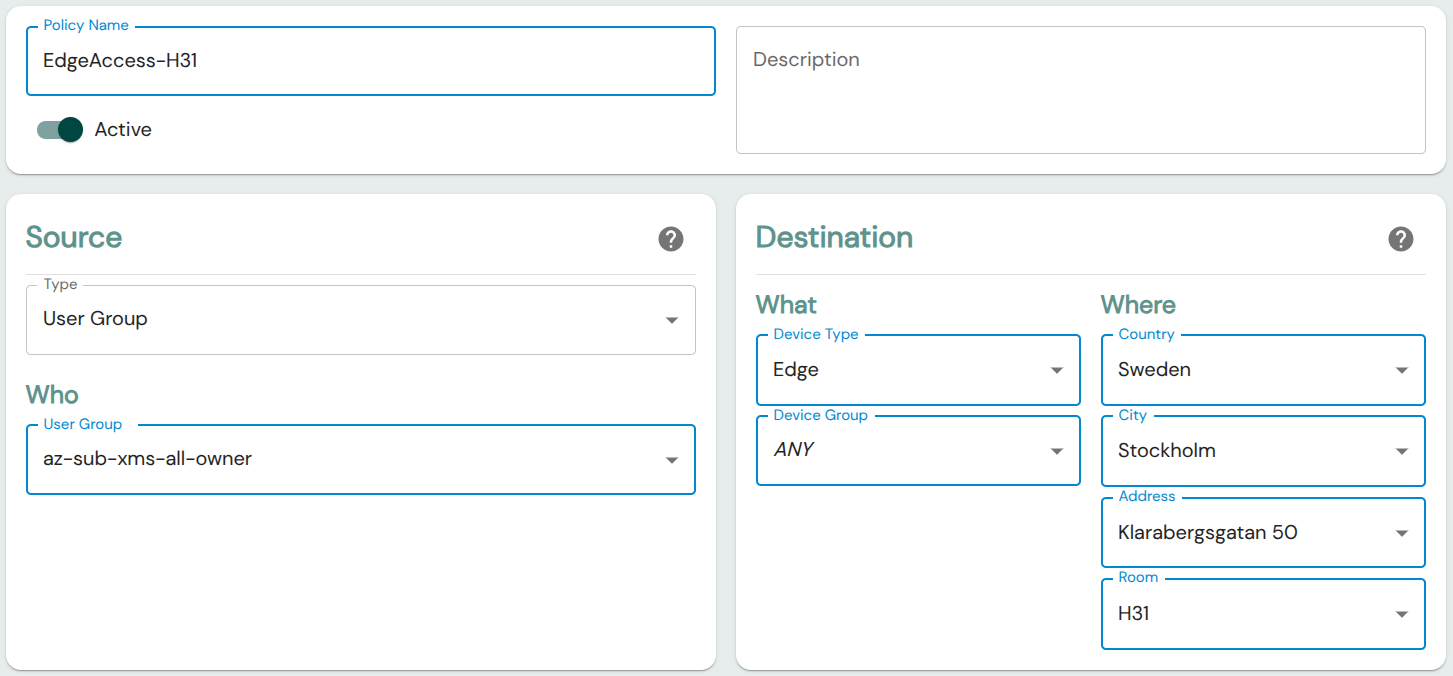
It will be listed as Policies permitting access to this device:

XoT Configuration
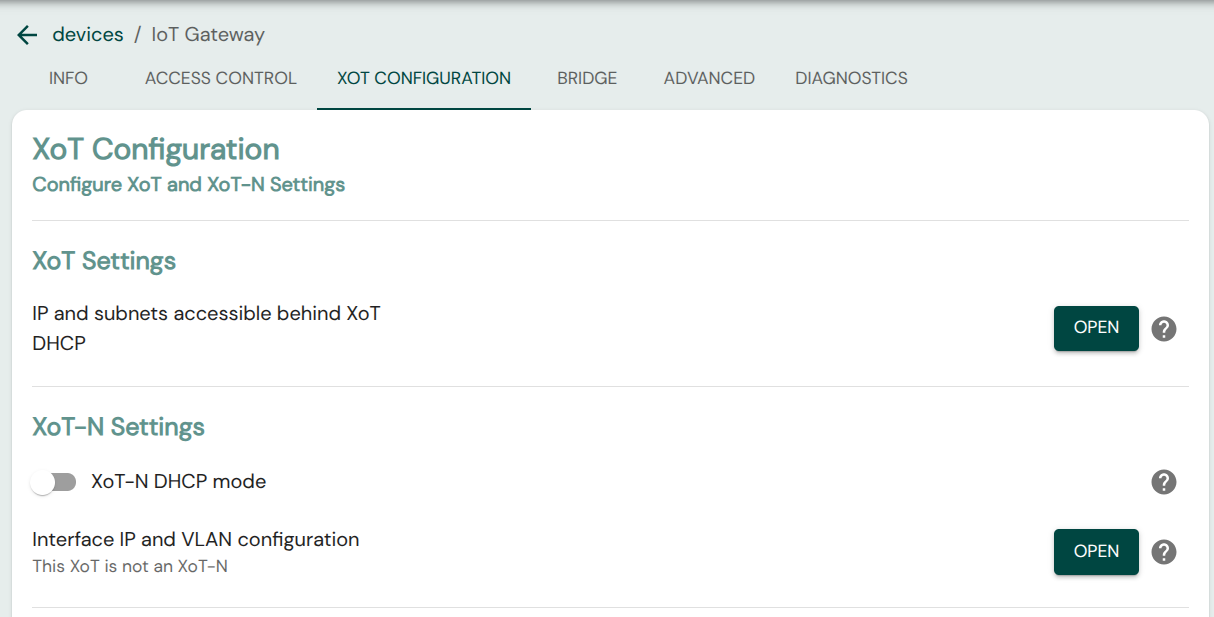
The XoT Settings controls what on the protected side of the XoT can be accessed by authenticated clients with access (through policies) to the XoT in question.
The XoT-N Settings are used to connect the XoT to one or more subnets on the protected side. This will configure what IP the XoT will have on the specified protected subnet.
XoT Settings
The XoT Settings section configures what protected device or devices can be made available to clients with access to the XoT.
DHCP configuration
The default mode is the simplest configuration. The XoT-Lock will figure out which device is available on the protected side by watching what IP is assigned to this device through DHCP and makes that address available to clients that are authenticated.
Manual configuration
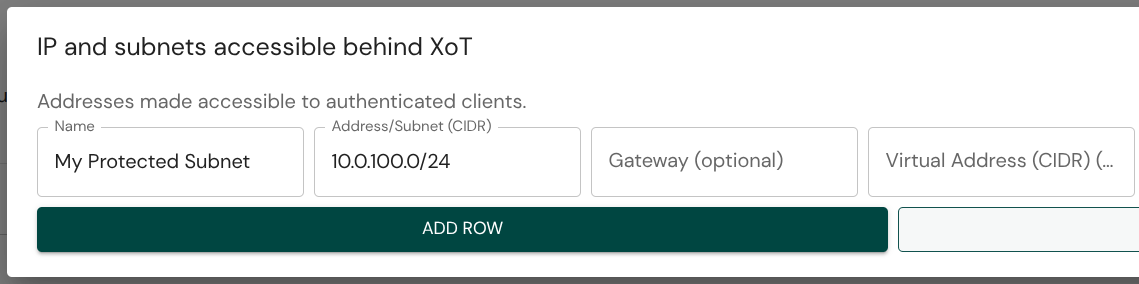
You can also manually configure what is made available from the protected side of an XoT-Lock. Simply click the button labeled OPEN under XoT Settings and then select ADD ROW.
This will take you to the accessibility configuration dialog.

From here, you can specify:
-
Name: Device or subnet name.
-
Address/Subnet (CIDR): Address of protected device or subnet
-
Gateway: If devices are not directly accessible on the protected side of the XoT, but need to be routed through a gateway, add the gateway IP here.
-
Virtual Address: Allows making a protected IP/Subnet available on another address from the client's perspective. This can be used to avoid conflicting routes on clients.
-
URL: Optional URL that enables easy connection to a given service from an XoT-Desktop or XoT-WebAccess client.
-
Description: Device or subnet description.
XoT-N Settings
The XoT-N settings configure subnets behind the XoT and the XoT's IP on those subnets.
XoT-N DHCP mode
This mode allows the XoT itself to act as DHCP server and gateway on behalf of protected devices. Once this is toggled you can enter a CIDR that tells the XoT what IP it should have and what subnet should exist on the protected side of the XoT.
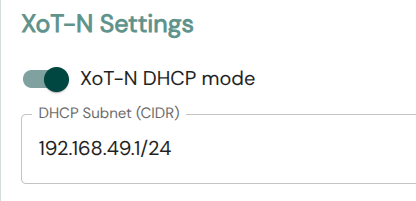
In this example, the IP of the XoT on its internal (protected) interface will be 192.168.49.1, and it will act as a DHCP server assigning IPs to clients on the 192.168.49.0/24 subnet.
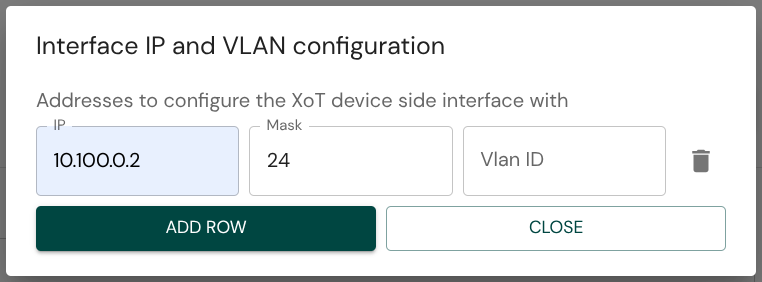
Clicking OPEN in the Interface IP and VLAN configuration section will take you to the configuration. If you don't have any existing configuration, click ADD ROW to set up a new protected subnet.
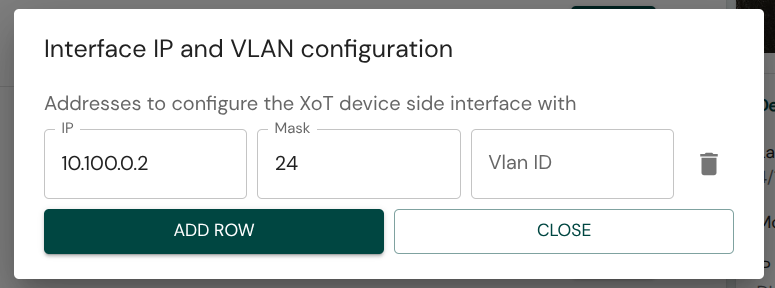
For any given subnet, you can configure a VLAN ID if the XoT will see VLAN-tagged traffic on its protected interface.
XoT Configuration Examples
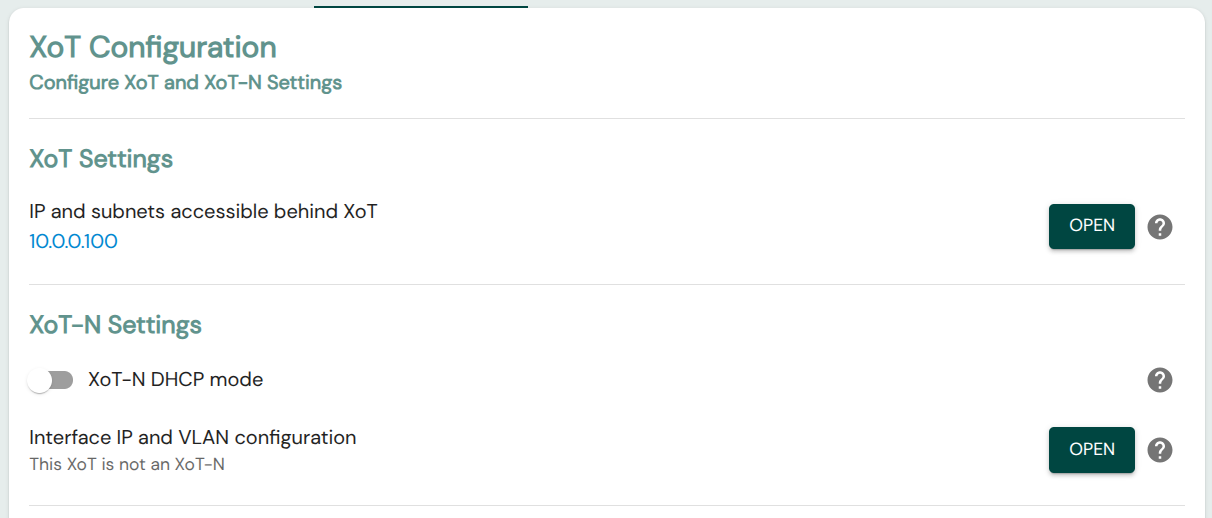
Single device configuration
By default an XoT will protect a single device and will automatically detect it's IP by looking at DHCP requests sent to the DHCP server.
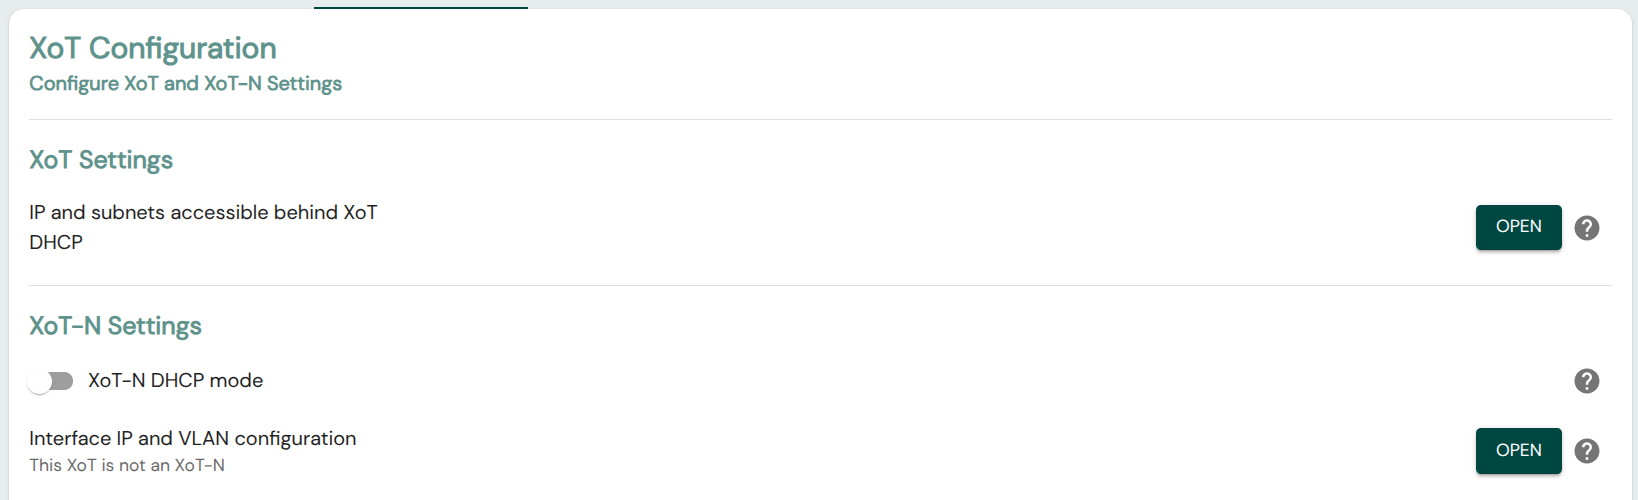
If you want to make a static IP available via the XoT-Lock, click on Open in the XoT Settings section and then set a device name and IP in the dialog that appears.
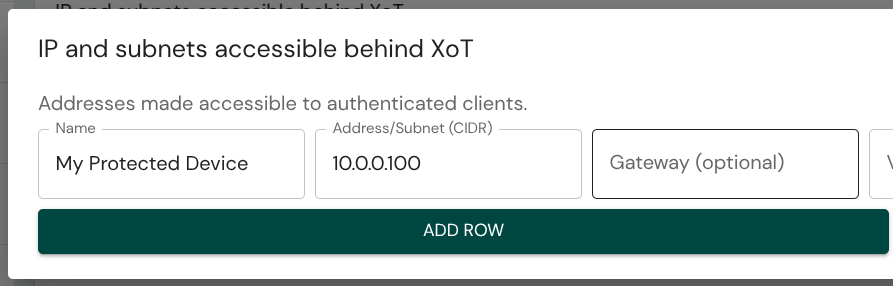
After closing the dialog, you should see that you have made a single IP available via this XoT.
Multi-device configuration
To make a whole subnet accessible from behind an XoT-Lock, you must specify that subnet and give the XoT-Lock an IP on that subnet.
First adjust the XoT Settings to make a whole subnet available. Click Open in the XoT Settings and enter a CIDR for the subnet in question.
Now you must give the XoT-Lock itself an IP on this subnet. To do this, click Open in the XoT-N Settings section (N for Net) and specify the IP and Mask for the XoT-Lock on this subnet.
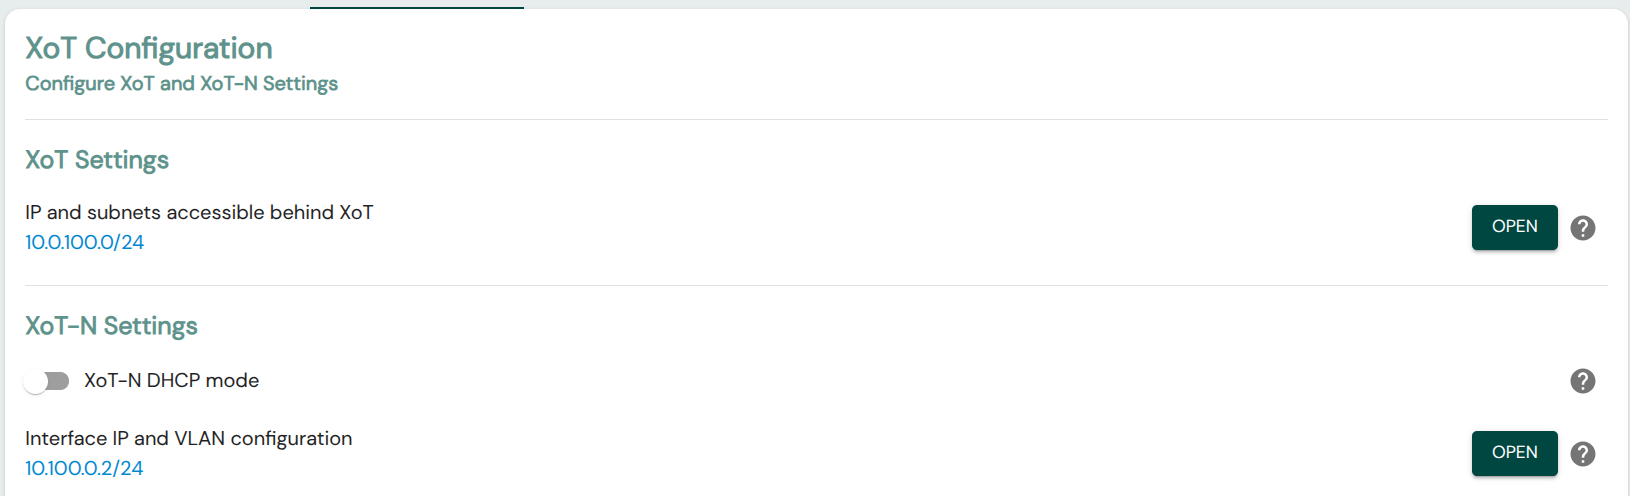
After closing the dialog, you should see both the accessible subnet and the IP of the XoT on that subnet.
Multiple subnets with VLANs
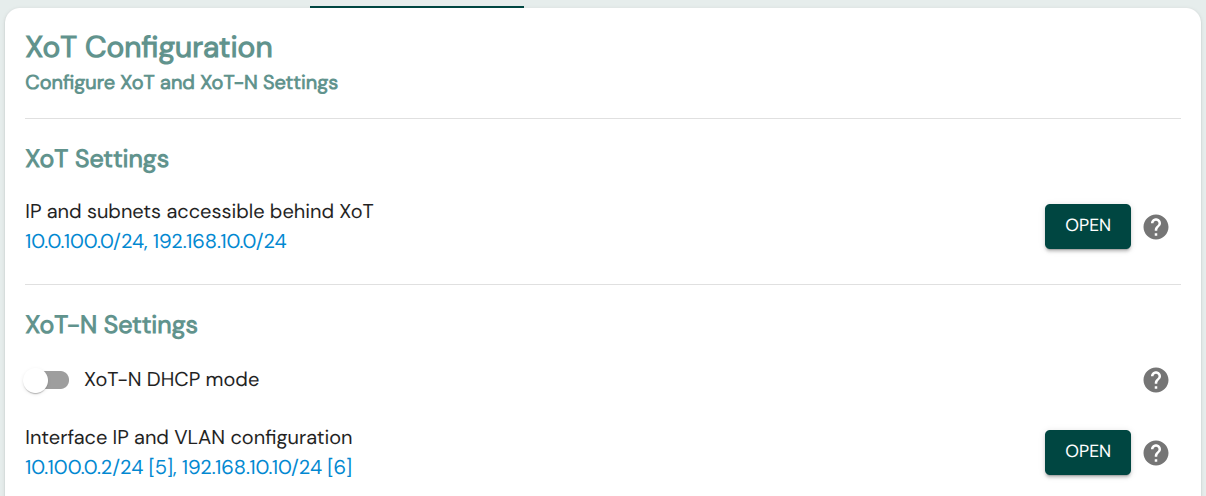
You can configure multiple subnets just by adding rows to both XoT Settings and XoT-N Settings. As we've seen previously, we can also add a VLAN ID in the XoT-N subnet settings.
Doing this will make the XoT-Lock send and expect to receive 802.1Q VLAN-tagged traffic on its internal/protected interface.
If we set something like this up, it might look like this:
Restrict device accessibility
In the above multi-device examples, the whole subnet behind the XoT-Lock has been made accessible, this is a common configuration. It is, however, possible that only some IPs of the subnet behind the XoT-Lock are accessible.
We can specify some specific IPs that clients should be able to access.
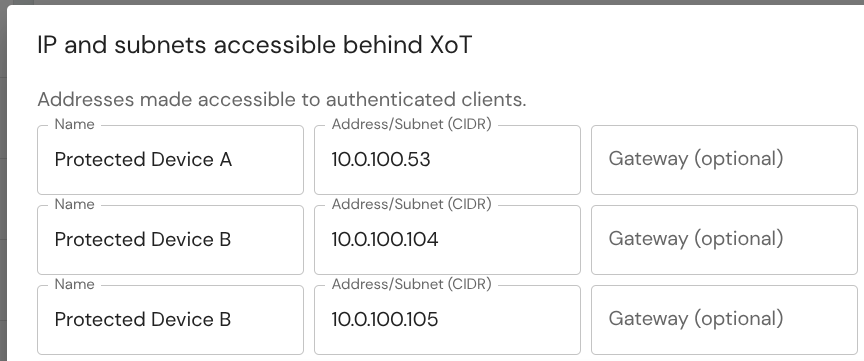
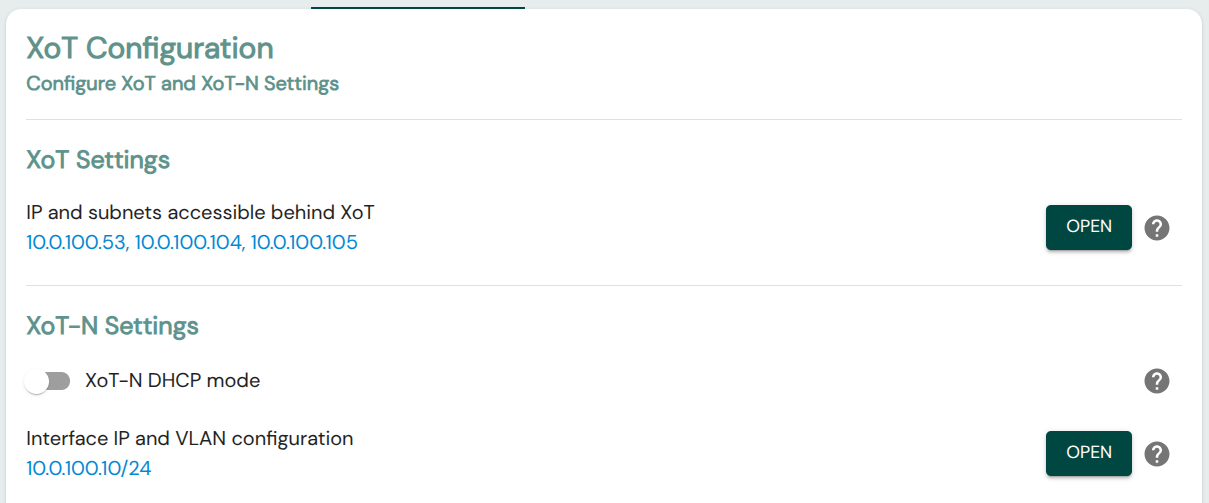
Once this is done, we will see the specific IPs listed as accessible, but the XoT-N settings define the full subnet.
Other configuration features
Devices accessible behind a gateway
If the devices listed for access are not reachable directly from the XoT-Lock's protected interface, we can specify the Gateway setting.
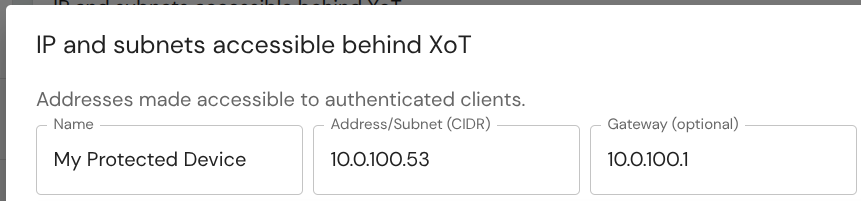
This configuration would mean that traffic from clients to the XoT-Lock would be routed to the specified gateway.
Preventing overlapping subnets with Virtual Address
For clients with access to many different subnets, one possible issue is that a client may be given access to overlapping subnet ranges. There could, for instance, be two completely different subnets that both use a common range, like 192.168.1.0/24.
For these cases, the Virtual Address can alleviate the issue by exposing the specified subnet on a different address range, from the clients' point of view.
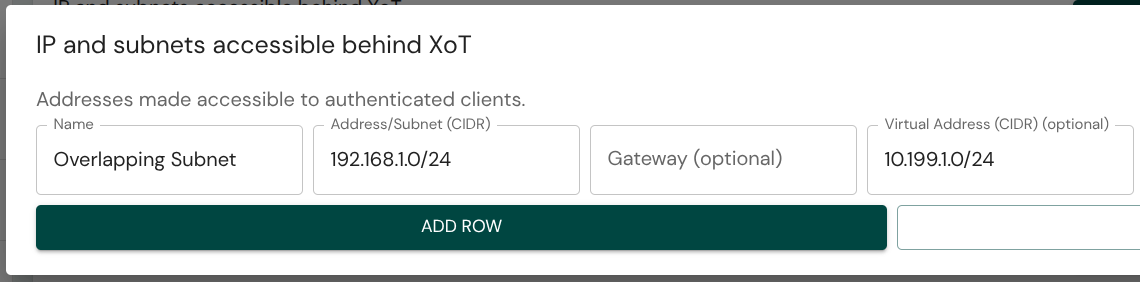
In this example, there is a 192.168.1.0/24 subnet behind the XoT-Lock. As this is a very common address range, it is set up with a virtual address to prevent IP conflicts on clients with access to it. Any client with access to this XoT will now get routes to the virtual address range 10.199.1.0/24. Traffic to and from this subnet gets NAT-ed by the XoT-Lock. The clients see the virtual address, while the actual subnet can keep its existing range.
Bridge
The Bridge tab covers XoT-Bridge-related functionality. From here, you can assign the XoT to a Bridge Group which will:
- If the XoT is not configured as an XoT-Bridge, make it accessible via any XoT-Bridge sharing the same Bridge Group.
- If the XoT is configured as a Bridge, it will make that bridge a point of access for any XoT-Lock sharing the same Bridge Group.
Under Bridge Configuration you can configure whether the XoT is a bridge or not by toggling Bridge Mode. If this mode is enabled then XoT-Bridge related settings. For more information on how to configure an XoT-Bridge see the bridge configuration manual.
Advanced
On the Advanced tab, some additional settings are available:
- External Address Override: If the routable IP to reach the XoT is not the IP that the XoT itself sees on its external interface, the IP through which it can be accessed may be set here.
- Access Request Port: The port on which the XoT shall receive requests for access from clients.
- 802.1X Configuration: Set 802.1X authentication settings
- SSH Configuration: Public key for SSH access to XoT. SSH is only available when using development/testing firmware and does not affect release versions.
- Masquerade inbound traffic: Toggle whether the XoT masquerades inbound traffic so that protected devices see network traffic coming from the XoT or the actual source.
- MTU Override: Specify a custom Maximum Transmission Unit (MTU) for the external interface. If left blank, the interface uses the MTU provided by the DHCP server (option 26). If none is provided, it falls back to the link default (1500 bytes for standard Ethernet).
- DHCP server ignores client id: Enabling this setting will make the XoT use the MAC address as client id when making requests to the DHCP server.
- Firmware Group: The firmware group determines which firmware is retrieved by the XoT. Firmware can be uploaded for the default 'all' group or a separate group, which only XoTs belonging to that group will receive. This enables things like testing of experimental firmware, etc.
Diagnostics
The diagnostics tab presents various information that can be use to verify that everything is set up as intended or help troubleshooting if not.
The Request Diagnostics from XoT allow you to retrieve current networking, firewall, and WireGuard configuration from the XoT.