XoT-Bridge Configuration
Relevant Resources
Read more about the general function of an XoT-Bridge in the component article here.
For how to create policies and configure access control, read this article.
Creating Bridge Groups
Access through XoT-Bridges are managed with something called Bridge Groups, which are just groupings of devices and bridges. Devices can be assigned to Bridge Groups and then access can be given to those devices through any bridges in a matching Bridge Group.
To create a Bridge Group, navigate to Infrastructure and then Bridge Topology in the main menu. Click the pencil icon in the top right and then the Add Bridge Group button that appears.
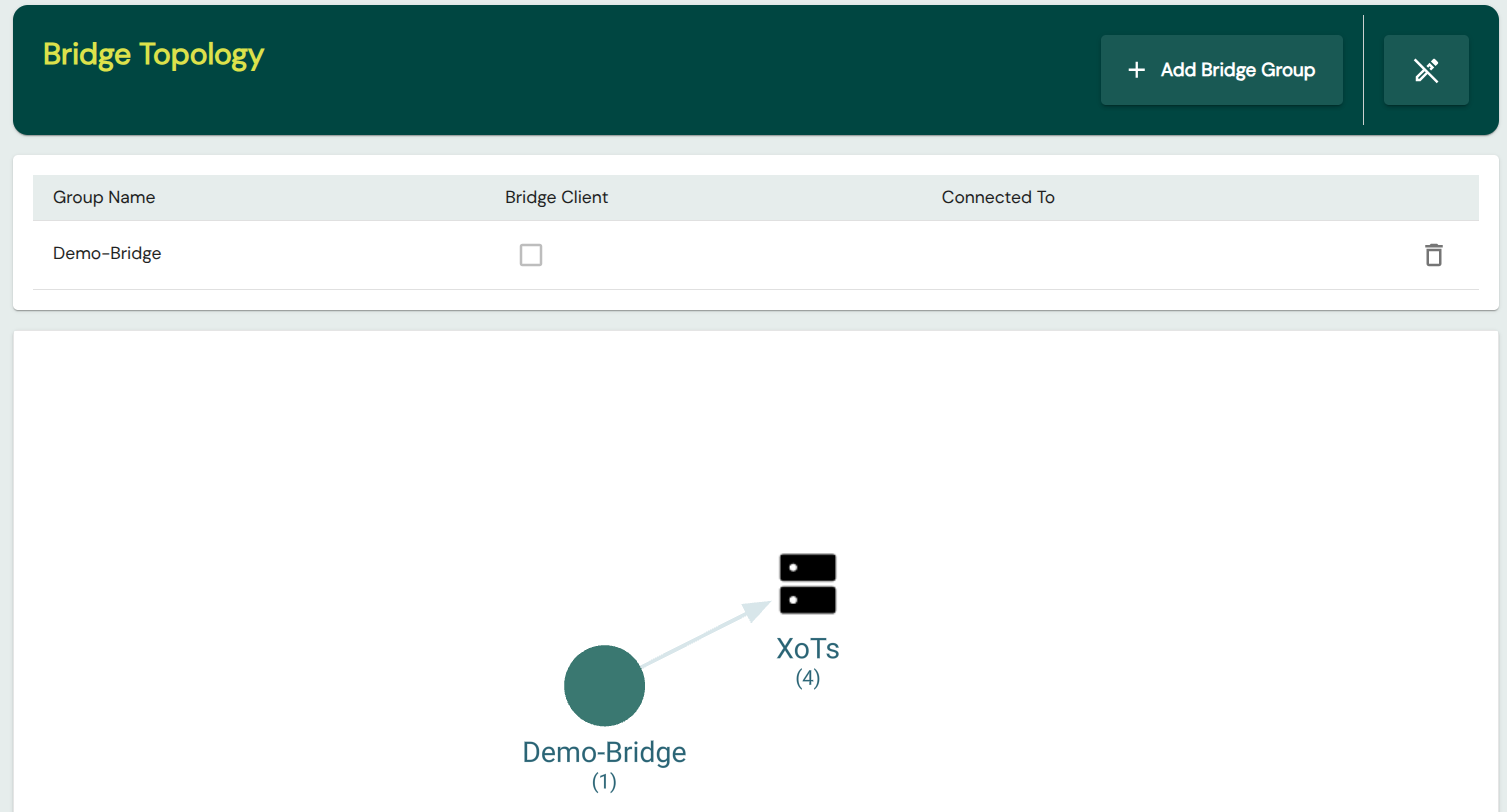
Enter your desired group name and click CREATE.
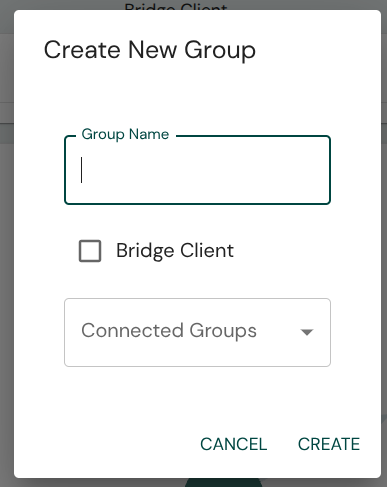
A new Bridge Group should now appear in the Bridge Topology diagram.
You may want to revisit this diagram after you have set up your XoT-Bridge and assigned devices to it.
Bridge Configuration
After selecting the bridge device from the device list, navigate to the Bridge tab, where the central Bridge settings await.
Start by assigning your bridge to the bridge group you created and enabling Bridge Mode.
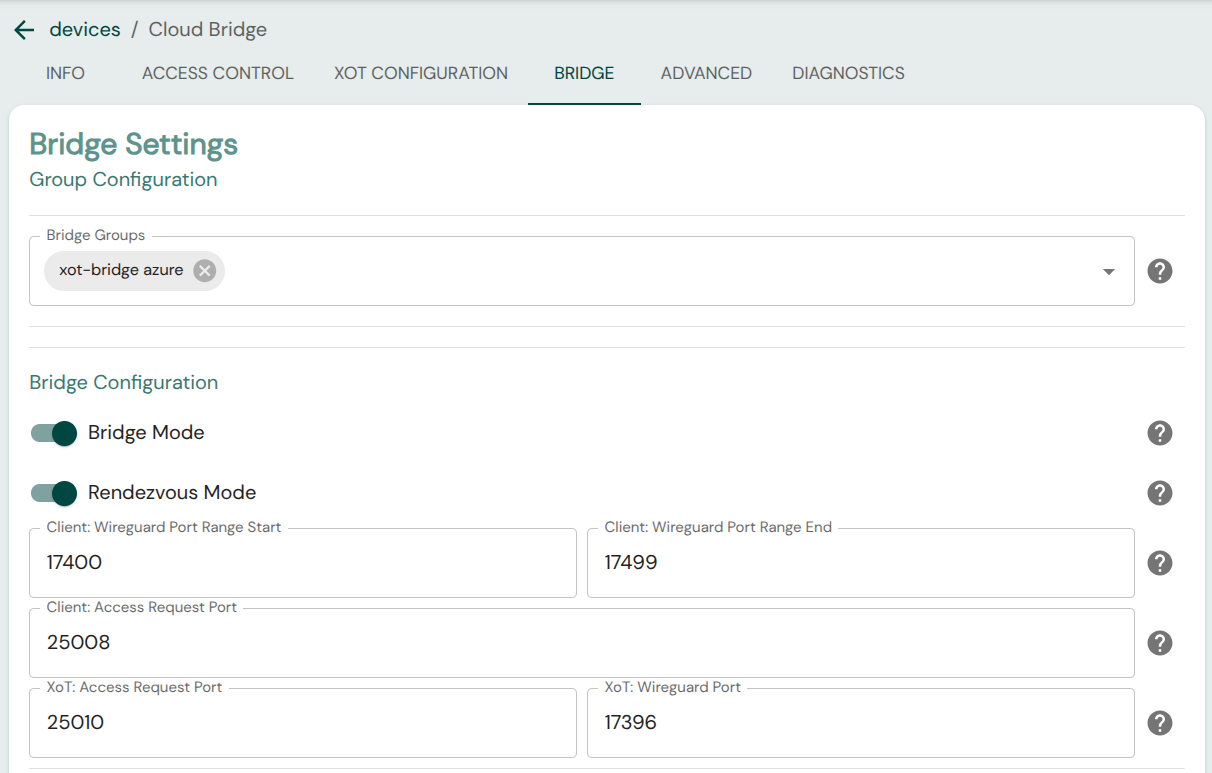
Bridge Mode
The XoT-Bridge has two different modes of operation, which are determined by whether Rendezvous mode is enabled or not. The mode controls which party initiates the connection and may have a considerable impact on what needs to be configured in firewalls surrounding the XoT-Bridge.
With the default setting, Rendezvous mode, the XoT-Locks' initiate the connection to the XoT-Bridge. This usually simplifies firewall configuration considerably and the XoT-Bridge has more flexibility in where it may be located. It does not need to be located on-premise where it can route traffic to the XoT-Locks, and can instead be hosted on a public cloud if so desired.
One way of looking at it is that in this mode, both clients and XoT-Locks call into the bridge.
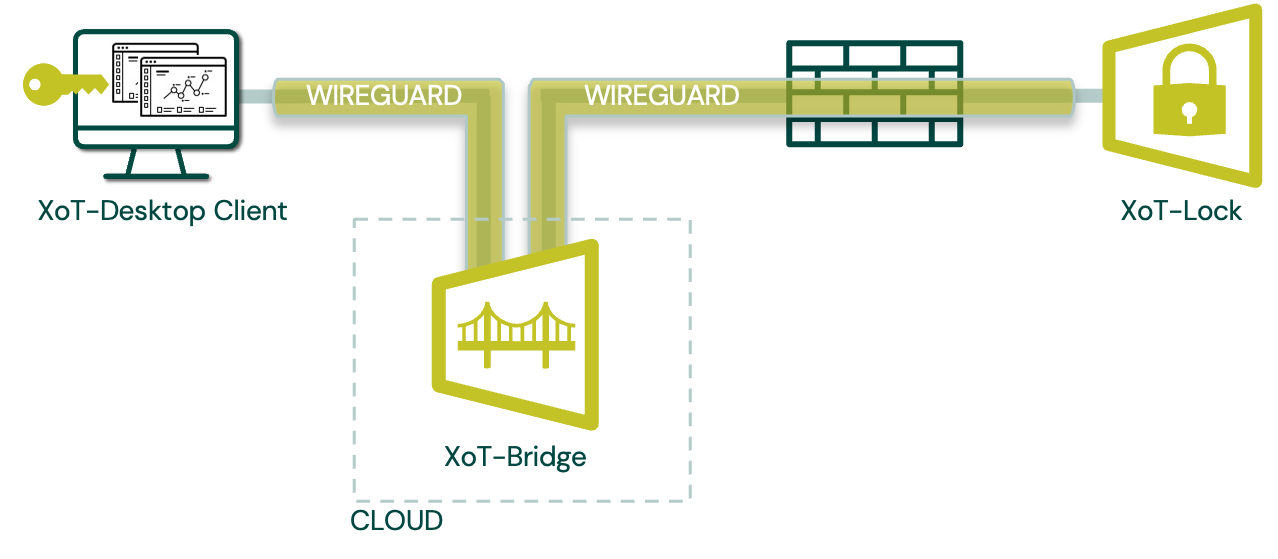
If Rendezvous mode is disabled, the XoT-Bridge works in a more traditional way, where clients initiate a connection to the XoT-Bridge, and the bridge initiates the connection to XoT-Locks. This typically involves more firewall configuration as ingress of traffic into a network is typically more restricted than egress, but this mode of operation may be preferable for some setups.
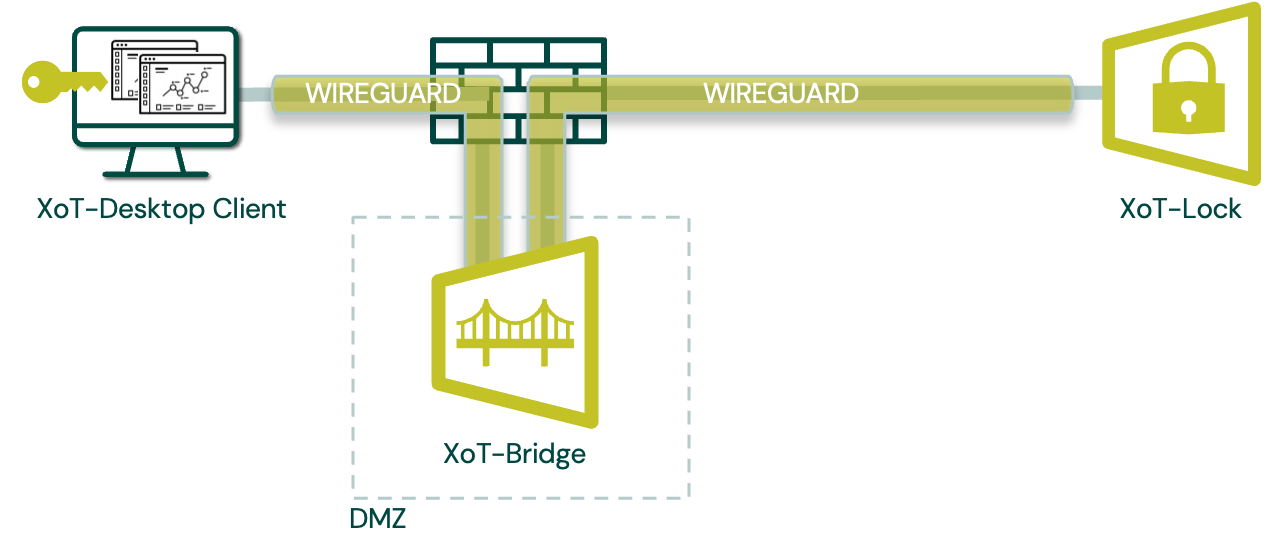
Port Configuration
You now need to assign a port range for encrypted traffic WireGuard Port Range Start and WireGuard Port Range End. The port ranges can be freely defined but keep in mind that they also need to be accessible through the firewall over UDP.
The other ports may be changed or left at their default values, but make sure to configure any firewall in front of the XoT-Bridge to allow UDP traffic to Access Request and WireGuard ports, as well as the Access Request port configured in the Advanced tab (default 25006).
Setting external address
The XoT-Bridge will report its external IP to XMS, but if network address translation (NAT) is performed on traffic to the XoT-Bridge then this self-reported IP cannot be used by clients to reach the XoT-Bridge. In these situations, the routable external IP will have to be manually specified so clients and XoT-Locks can reach the bridge.
To set this value, navigate to the Advanced tab, and set the externally routable IP of the XoT-Bridge in the External Address Override field.
Diagnostics
You are now done with the core configuration of the XoT-Bridge.
If you are experiencing issues or want to see more detailed information on the XoT-Bridge, note the Diagnostics tab on the far right. From here you can request detailed information regarding the current configuration of network interfaces, routing information, firewall status and WireGuard tunnel status.